A drone image carries information about a crop not only in its brightness, but also in its texture. A dense canopy and a sparse one produce different fine-grained patterns of light and shade. Texture analysis turns those patterns into numbers, giving you features that vegetation indices alone cannot capture. This page walks through adding the image-processing library Orfeo Toolbox (OTB) to the free GIS software QGIS, and computing texture features from a UAV orthoimage, step by step.
What you need (all free)
- QGIS — free GIS software from qgis.org. Choose a version that OTB supports (see below)
- Orfeo Toolbox (OTB) — a free image-processing library from orfeo-toolbox.org that does the texture computation
- A UAV orthoimage — the .tif orthoimage you want to analyze (RGB or multispectral)
The OTB plugin only works with certain QGIS versions. Installing the newest QGIS may leave the plugin unusable, so the reliable approach is to first check which QGIS version your OTB supports and install that version of QGIS. You can confirm the compatibility on the official OTB site.
This article uses QGIS 3.22 with OTB 8.0.0, a combination that is confirmed to work. Start with this pairing, and only try other versions if something does not work.
Download the QGIS version you identified in Step 1 from qgis.org and install it. Run the installer and follow the prompts.
Next, download OTB from orfeo-toolbox.org and extract it somewhere convenient. Note the path of the extracted folder (for example, C:/OTB-8.0.0-Win64), since you will point QGIS to it in the next step.
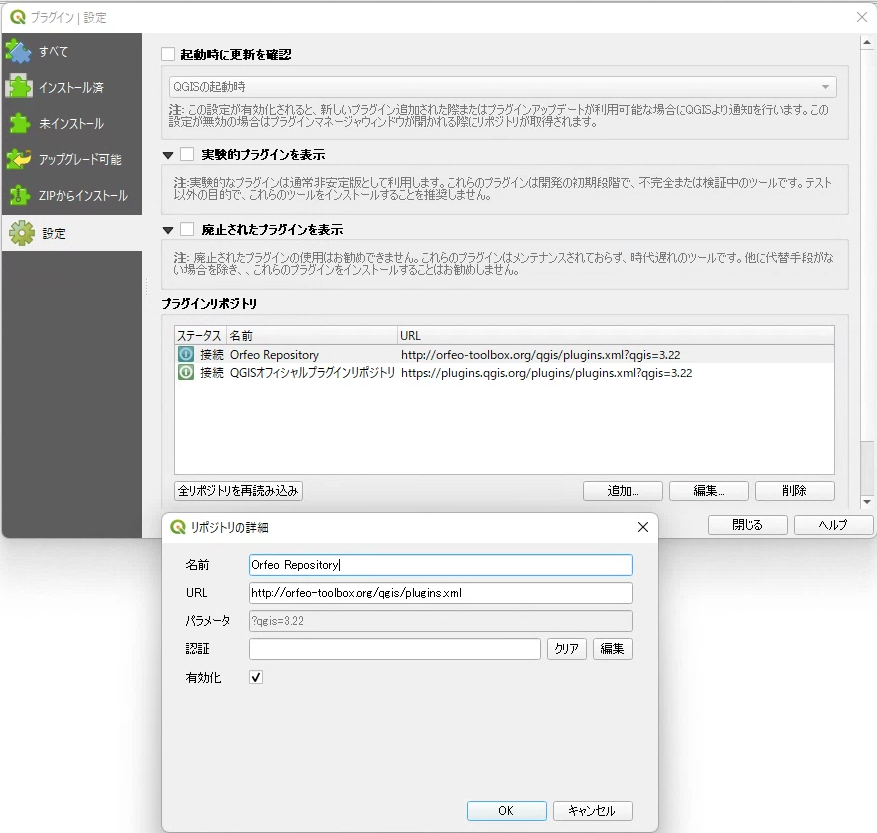
To let QGIS call OTB, set up two things. First, open "Plugins → Manage and Install Plugins," go to "Settings," and under "Plugin repositories" click "Add" to register the OTB repository. Give it a clear name (for example, Orfeo Repository) and enter the URL http://orfeo-toolbox.org/qgis/plugins.xml.
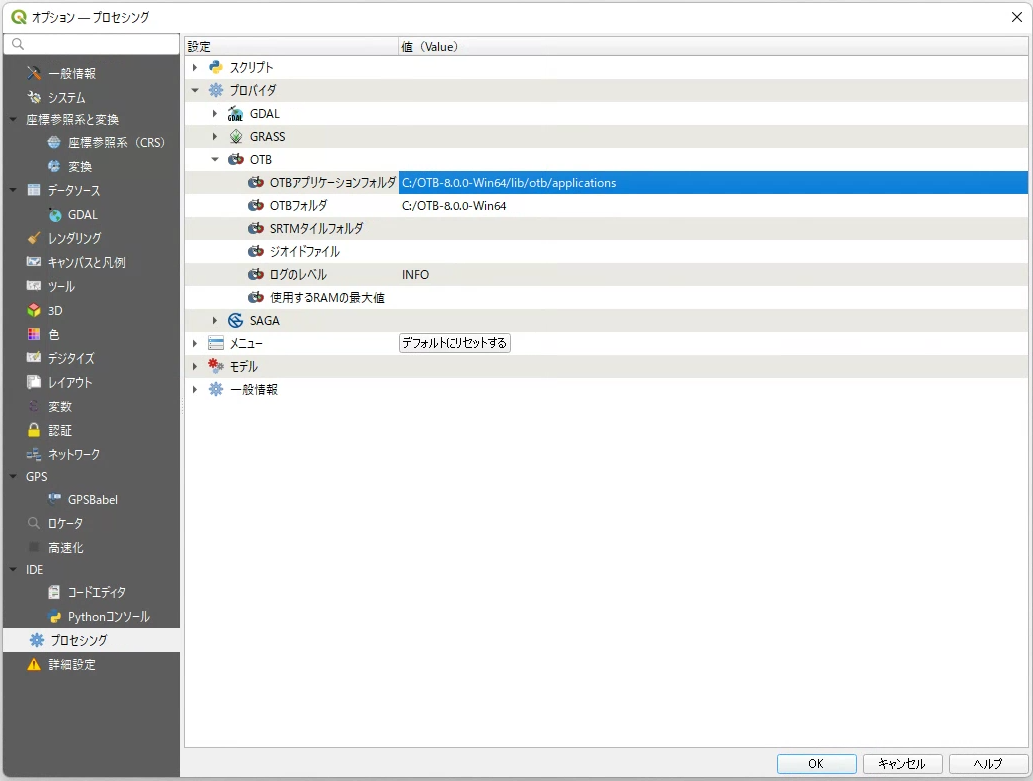
Next, open "Settings → Options" and select "Processing → Providers → OTB." Set "OTB application folder" to (your extracted path)/lib/otb/applications and "OTB folder" to the extracted folder (for example, C:/OTB-8.0.0-Win64), then click "OK."
When the setup is correct, an OTB entry appears in the Processing Toolbox on the right. Open it and OTB's tools, including texture analysis, become available.
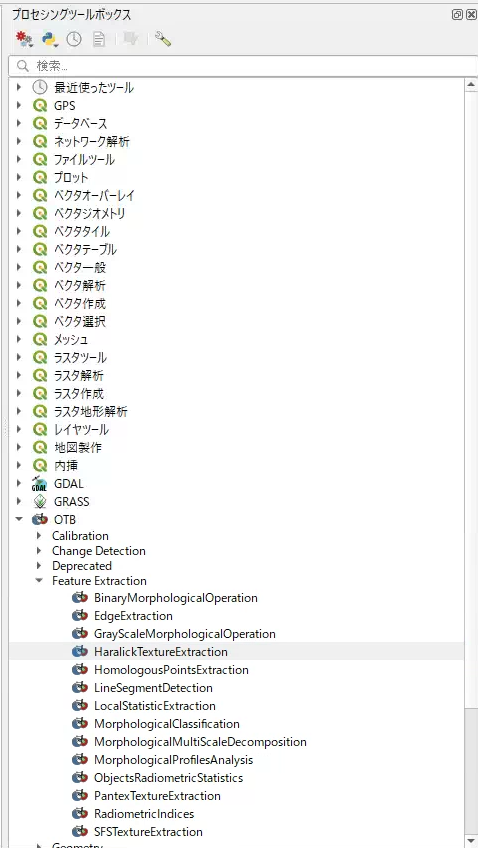
In the Processing Toolbox, open "OTB → Feature Extraction → HaralickTextureExtraction." This is a well-known way to quantify texture from the pattern of light and shade in an image (Haralick texture features). Set your orthoimage as the "Input Image," adjust the settings below as needed, and run it.
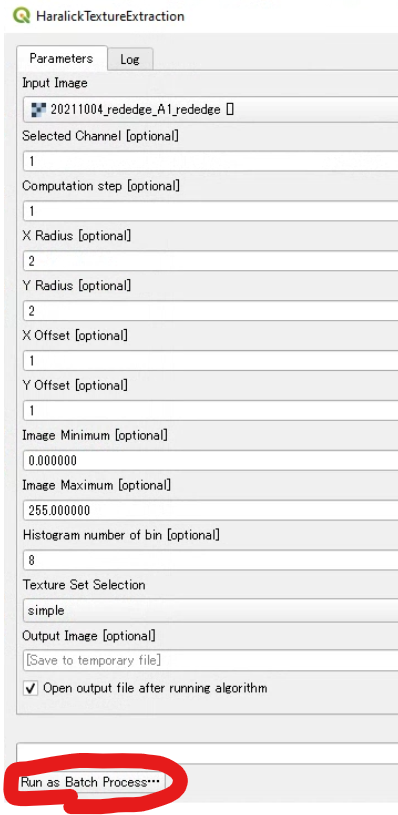
- Selected Channel — the band (channel) to analyze
- X Radius / Y Radius — the size of the window used to read texture. Larger windows capture broader patterns
- Histogram number of bin — how many levels the brightness is divided into
- Texture Set Selection — which texture features to output (such as "simple")
Running it produces a new image holding the texture features. Try the defaults first, then adjust the window size and other settings while looking at the results.
You do not need to understand every parameter at first; the defaults are fine. What matters is using the same settings for every image. If the settings vary, you can no longer compare one field with another.
When you have many images across several fields, processing them one by one is tedious. Click "Run as Batch Process" at the bottom of the parameter window to process many images with the same settings at once.
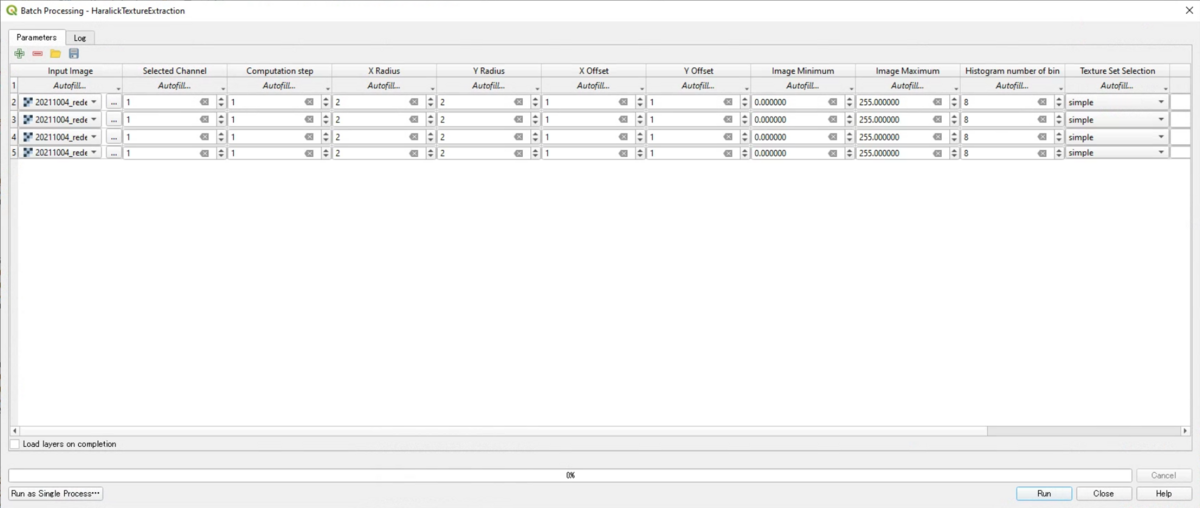
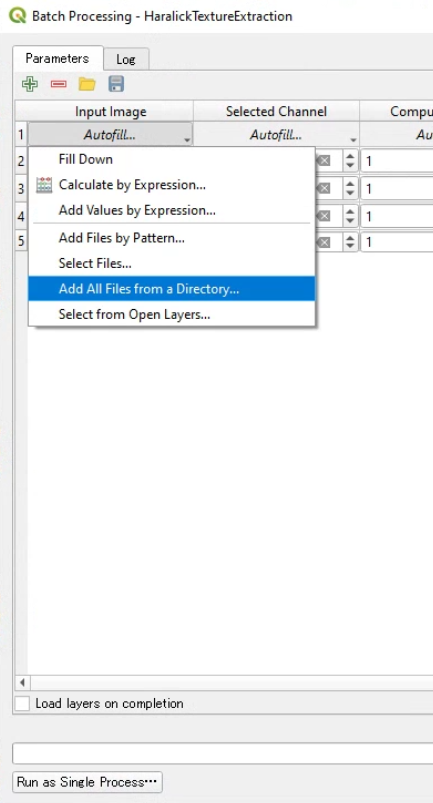
You can add input images one by one, but choosing "Add All Files from a Directory..." from the menu at the top of the "Input Image" column adds every image in a folder at once. Match the other columns and click "Run" to get the texture features for all images together.
Combined with vegetation indices and plant height, texture features can improve the accuracy of crop growth estimation. QGIS and OTB are both free, and once you are used to them the whole flow takes only a few minutes. Try it on a single image first, and once it works, use batch mode to scale up to the whole field.